這篇是 SSIM 系列第三篇,接續前篇 使用 PyTorch 實做 2D 影像捲積,
要來談一下 SSIM 如何在不均勻光源下優化 SSIM。
如果你是剛開始接觸 SSIM 的人,可能會跟我一樣看過一篇幫愛因斯坦去噪的實現文章。
沒錯,當初我也是看到愛因斯坦的臉逐漸浮現,才覺得 SSIM 可以拿來解工程問題!
只是愛因斯坦那篇的調節亮度方法對於工程來說太過理想化,
問題在於他是把整張圖片的像素值乘以 0.9 調亮度!
這樣的話 SSIM 算法裡面的變異數項是不會變的,只有考慮到平均數項,
所以他做出來的 SSIM 值不會差太多。
但是現實世界是很絢爛多彩且難以預測的,
就像我前兩天載室友出門,停等紅燈時他突然發生奇怪的聲音,
轉頭問他在幹麻?
:我在跟你的機車排氣管對頻。
實務上,我們可能會面對不均勻光源的問題,就像是街邊的燈光:
這燈光很糟糕,比忘記簽聯絡簿的國小學童還糟糕,
因為它的光源只會影響照片的一部分,而且還會隨著距離遞減。
如果使用原版的 SSIM 方法對比這種有無開燈的照片,
則 SSIM值會不可避免的大幅下降,
但這兩張照片的前景內容物(e.g. 人、車、直升機、脫光衣服在路上奔跑的人)一樣對吧?
所以在基於前景的情況下,有些時候我們會希望有無開燈的照片應該要一樣,
數學上也就是得到理想值為 1 的 SSIM 值。
(實在是繞口令,讓我想到事件攝影機。)
要解這個問題就要先了解 SSIM 的本質,
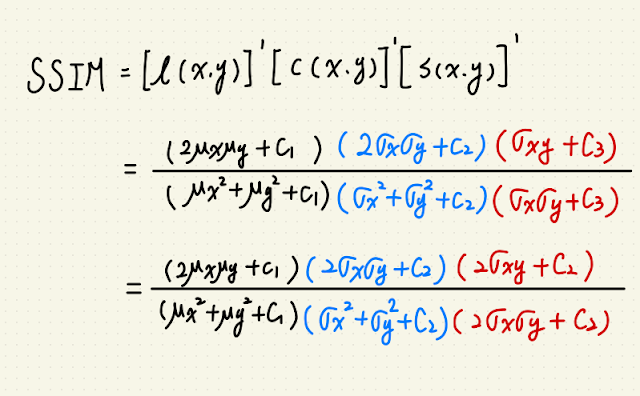
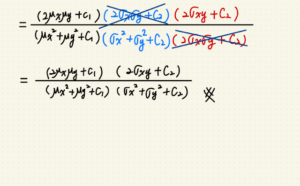
SSIM 是由 sliding window 來解圖片中各自區域均值、變異數,還有兩張圖片的共變數所構成。
而二維的 window 又是由一維的 kernel (通常是 Gaussian)矩陣相乘得到,
基本上 OpenCV 裡面提供的方法是這樣:
nkernel = cv2.getGaussianKernel(11, 1.5)
nwindow = np.outer(nkernel, nkernel.transpose())
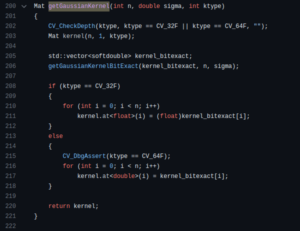
往 cv2.getGaussianKernel 裡面看,我們可以知道這條函式來自 getGaussianKernelBitExact:
再往 getGaussianKernelBitExact 裡面看:
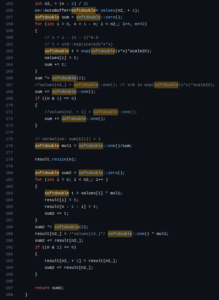
重點是 158, 181 行運算的兩個迴圈,他們在幫忙算高斯核並歸一化。
我們的重點是歸一化,以前的簡易版 OpenCV Source Code 大概長這樣:
def getGaussianKernel(M, std):
    n = np.arange(0, M) - (M - 1.0) / 2.0
    sig2 = 2 * std * std
    w = np.exp(-n ** 2 / sig2)
    muli = 1/sum(w[:])
    wn = w * muli

    return wn
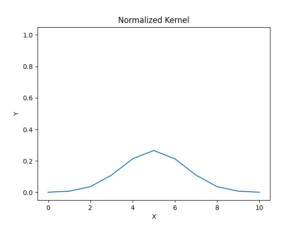
這種歸一化的一維高斯核長得像是:
扁扁有點可愛,像是軟趴趴的史萊姆。
但是這樣可能會造成一些問題,
X=4, X=6 這個漢明距離為一的,是你的父母,得到他們的紅包預算 *0.21 倍;
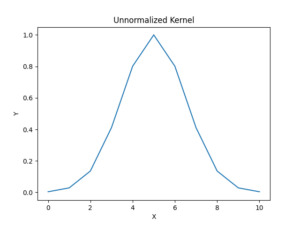
讓我們看看非歸一化的原始高斯核:
以下附上我的實驗源碼:
def ourGaussianKernel(M, std):
    n = np.arange(0, M) - (M - 1.0) / 2.0
    sig2 = 2 * std * std
    w = np.exp(-n ** 2 / sig2)
    # muli = 1/sum(w[:])
    # wn = w * muli

    return w

def ssim_Normalized(img1, img2):
    C1 = (0.01 * 255)**2
    C2 = (0.03 * 255)**2

    img1 = img1.astype(np.float64)
    img2 = img2.astype(np.float64)
    nkernel = cv2.getGaussianKernel(11, 1.5)
    nwindow = np.outer(nkernel, nkernel.transpose())
    nmu1 = cv2.filter2D(img1, -1, nwindow)[5:-5, 5:-5]
    nmu2 = cv2.filter2D(img2, -1, nwindow)[5:-5, 5:-5]
    nmu1_sq = nmu1**2
    nmu2_sq = nmu2**2
    nmu1_mu2 = nmu1 * nmu2
    nsigma1_sq = cv2.filter2D(img1**2, -1, nwindow)[5:-5, 5:-5] - nmu1_sq
    nsigma2_sq = cv2.filter2D(img2**2, -1, nwindow)[5:-5, 5:-5] - nmu2_sq
    nsigma12 = cv2.filter2D(img1 * img2, -1, nwindow)[5:-5, 5:-5] - nmu1_mu2
    nssim_map = ((2 * nmu1_mu2 + C1) *
                (2 * nsigma12 + C2)) / ((nmu1_sq + nmu2_sq + C1) *
                                       (nsigma1_sq + nsigma2_sq + C2))
    return nssim_map.mean()

def ssim_Unnormalized(img1, img2):
    C1 = (0.01 * 255)**2
    C2 = (0.03 * 255)**2

    img1 = img1.astype(np.float64)
    img2 = img2.astype(np.float64)
    kernel = ourGaussianKernel(11, 1.5)
    window = np.outer(kernel, kernel.transpose())
    mu1 = cv2.filter2D(img1, -1, window)[5:-5, 5:-5]
    mu2 = cv2.filter2D(img2, -1, window)[5:-5, 5:-5]
    mu1_sq = mu1**2
    mu2_sq = mu2**2
    mu1_mu2 = mu1 * mu2
    sigma1_sq = cv2.filter2D(img1**2, -1, window)[5:-5, 5:-5] - mu1_sq
    sigma2_sq = cv2.filter2D(img2**2, -1, window)[5:-5, 5:-5] - mu2_sq
    sigma12 = cv2.filter2D(img1 * img2, -1, window)[5:-5, 5:-5] - mu1_mu2
    ssim_map = ((2 * mu1_mu2 + C1) *
                (2 * sigma12 + C2)) / ((mu1_sq + mu2_sq + C1) *
                                       (sigma1_sq + sigma2_sq + C2))
    return ssim_map.mean()
if __name__=='__main__':
    img1_path = 'img1.png'
    img2_path = 'img2.png'
    kernelSize = 21
    light = list(map(np.uint8, gkern(kernlen=kernelSize, std=1.5)*100))
    img1 = np.random.randint(0, 150, size=(100, 100)).astype(np.uint8)
    img2 = np.zeros_like(img1)
    img2[:] = img1[:]

    row = np.random.randint(int(kernelSize/2), img1.shape[0] - int(kernelSize/2))
    col = np.random.randint(int(kernelSize/2), img1.shape[1] - int(kernelSize/2))
    times = np.random.randint(1, 100)
    for i in range(0, times):
        img2[row:row + kernelSize, col:col + kernelSize] += light
    img2 = np.clip(img2, 0, 255)

    print("This is Normalized): " + str("{:.5f}".format(ssim_Normalized(img1, img2))))
    print("This is Unnormalized): " + str("{:.5f}".format(ssim_Unnormalized(img1, img2))))
親測可用:
